
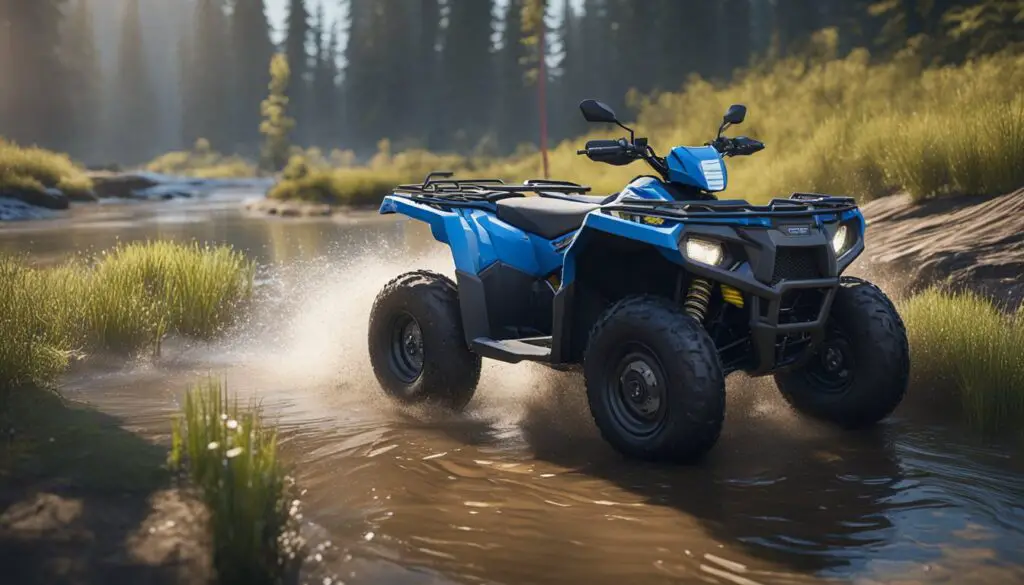
If you’re experiencing issues with your Polaris ATV or UTV brakes not building pressure, you’re not alone. This common problem can often be attributed to air trapped in the braking system, which prevents the build-up of hydraulic pressure needed to operate the brakes effectively. Air can enter the system during brake component replacement or when the fluid level drops too low and allows air to enter the master cylinder.
Proper bleeding of your brakes is the usual fix for removing air and restoring pressure. It’s important to follow the correct bleeding procedure, which may vary slightly depending on whether your vehicle is equipped with drum or disc brakes. Adjusting brake shoes before bleeding is crucial for drum brakes, to ensure that no air remains trapped. In disc brake systems, it’s imperative to ensure all air is expelled from the brake lines and calipers.
In some cases, the issue might not be air at all, but rather a problem with the brake fluid or brake components themselves. Brake fluid that has never been changed or has been contaminated can lead to a loss of brake pressure. Additionally, worn or damaged brake lines, seals, or the master cylinder can cause similar symptoms. Regular maintenance and prompt replacement of faulty parts are key to keeping your braking system functional.
Understanding Brake System Basics
Brakes are essential for your ATV’s safety, and a strong understanding of the brake system ensures you can maintain optimal performance. Let’s explore the components that makeup ATV brakes and their operation in the hydraulic brake system.
Components of ATV Brakes
Your ATV’s brake system is composed of several key components that work together to bring you to a stop:
- Master Cylinder: This is the heart of the braking system, usually located on the handlebars or foot pedal of your ATV.
- Brake Lines: These lines transport hydraulic fluid to apply pressure to the brake calipers.
- Brake Calipers: These components house the brake pads and pistons.
- Brake Pads: These pads push against the rotors when you engage the brake lever, causing friction that slows down the ATV.
Hydraulic Brake Systems
Hydraulic brake systems operate on the principle of fluid dynamics. Here’s how they work in steps:
- Pressure Generation: When you apply force to the brake lever, the master cylinder piston compresses brake fluid.
- Fluid Displacement: This pressure travels through the brake lines to the calipers.
- Brake Activation: The calipers receive the pressure, pushing the brake pads against rotors.
- Friction and Braking: This contact creates the necessary friction to slow down or stop your ATV.
It’s imperative to maintain the integrity of the hydraulic fluid and ensure there are no air bubbles in the brake lines, as these can prevent the system from building the pressure needed to activate the brakes efficiently.
Identifying Why Your Polaris Brakes Won’t Build Pressure
In maintaining your Polaris ATV’s brakes, you should be aware of key factors that can prevent them from building pressure, like fluid integrity, trapped air, or brake component wear.
Brake Fluid Problems
Leaking Brake Fluid: Check for any signs of fluid leaking from the brake lines or the master cylinder, which can cause a drop in hydraulic pressure.
Low Brake Fluid Level: Ensure that the brake fluid in the master cylinder is at the proper level, as low fluid can impede brake pressure.
Air in the Brake System
Air can enter your brake system when components are replaced or if there’s been a breach in the system’s integrity. Since air is compressible, it prevents your brake system from building the necessary pressure. This issue can often be rectified through a process called “bleeding,” which removes trapped air from the brake lines.
Worn Brake Pads and Damaged Lines
Worn Out Brake Pads: Require more pressure to create enough friction to stop your vehicle. Inspect your pads for wear.
Damaged Brake Lines: Look out for any damage or wear on the lines, as this could compromise the pressure in the brake system.
Regular Brake Maintenance
Properly maintaining your Polaris ATV’s brakes ensures they function effectively and build necessary pressure. Regular maintenance includes thorough inspection, timely replacement of brake fluid, and correct adjustment of brake components.
Brake Inspection Practices
You should perform routine checks on your brake system to identify wear and potential issues before they worsen. Here’s a quick checklist:
- Pads and Rotors: Check for wear and replace if they are below the minimum thickness.
- Brake Lines and Connections: Look for any signs of damage or leaks and ensure all connections are secure.
- Fluid Level: Verify that the brake fluid is at the correct level in the reservoir. Top it off with the recommended brake fluid if needed.
Use brake cleaner to remove grime and brake dust during inspection.
Replacing Brake Fluid
Brake fluid degrades over time and with use, affecting your ATV’s braking pressure. To replace it, follow these steps:
- Locate the brake fluid reservoir and remove the cap.
- Use a brake bleeder kit to drain the old fluid.
- Refill with fresh brake fluid to the recommended level.
- Bleed the brake lines to remove any air, as air pockets can prevent pressure build-up.
Regularly check and replace your brake fluid at least once every two years or according to your ATV’s service manual.
Adjusting Brake Components
Adjustment is key to brake function and pressure:
- Brake Pads: Ensure that they are correctly aligned with the rotors and there’s no undue movement.
- Brake Shoes (if applicable): For drum brakes, these need to be properly adjusted to avoid air being trapped in the system, which hampers pressure build-up.
- Cables and Linkages: Adjust them to ensure that they are taut and provide the correct amount of pressure to the braking system when engaged.
Step-by-Step Brake Bleeding Guide
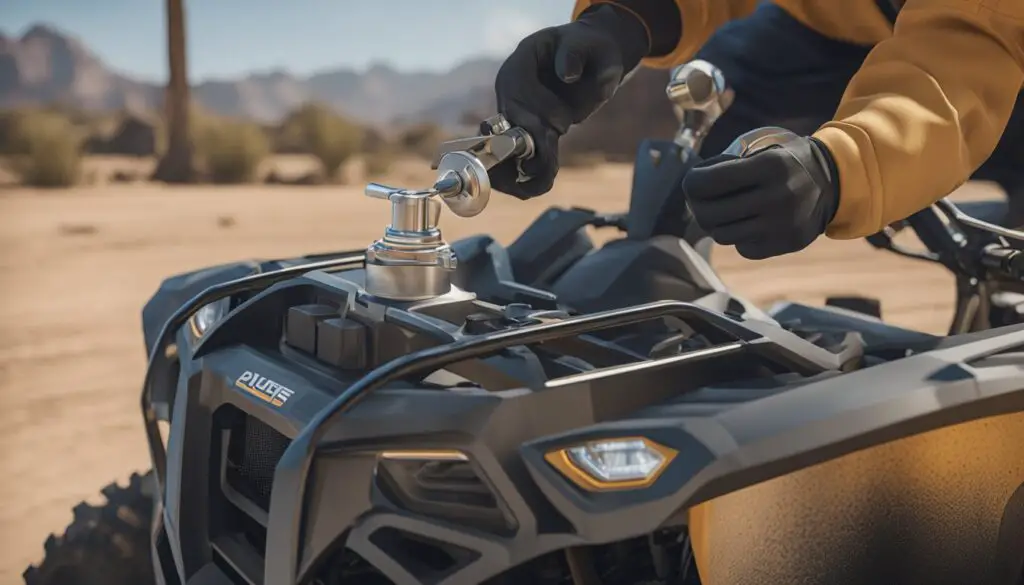
If your Polaris brakes aren’t building pressure, it’s usually due to air trapped in the system which can be remedied through brake bleeding. This guide will illustrate how to bleed your brake system effectively, whether manually or using a vacuum bleeder kit.
Manual Bleeding Procedure
To manually bleed your brake system, you’ll need a partner to help with pumping the brakes. Begin by topping off your brake fluid to the maximum level mark. Then, follow these simple steps:
- Ask your partner to pump the brake lever or foot pedal 3 to 4 times and then hold the pressure.
- Locate the bleeder valve on the brake caliper and place a drain hose over the nipple, with the other end in a container to catch the expelled fluid.
- While they maintain pressure on the brake, open the bleeder valve with an 8 mm wrench to release fluid and trapped air.
- Close the valve before your partner releases the brake lever or pedal.
- Repeat this process until you see no air bubbles in the expelled fluid, making sure to keep the reservoir topped up throughout the procedure.
Using a Vacuum Bleeder Kit
A vacuum bleeder kit can simplify the bleeding process, as it doesn’t require an assistant. Here’s how you use one:
- Attach the vacuum bleeder kit to the bleeder valve.
- Pump the vacuum unit to create suction.
- Open the bleeder valve and watch for air bubbles in the line coming into the vacuum reservoir.
- Once the bubbles cease and you have a steady stream of brake fluid, close the bleeder valve.
- Repeat on each wheel’s caliper, ensuring the master cylinder reservoir doesn’t run dry.
Ensuring Successful Bleeding
To ensure you’ve successfully bled the brakes and removed all air from the system:
- Check for Firm Brake Pressure: After bleeding each caliper, check the brake lever or pedal. It should feel firm when pressed and not spongy.
- Monitor Fluid Levels: Constantly keep an eye on the brake fluid reservoir, topping up as needed to prevent air from being drawn into the system.
- Inspect for Leaks: After the bleeding process, inspect all hose connections and the bleeder valves for any signs of leaks that could allow air back into the system.
Troubleshooting Brake Pressure Issues
When you notice your Polaris ATV brakes failing to build pressure, you might face one of several common issues. Proper troubleshooting involves checking the brake lines, master cylinder, and critical seals or gaskets that may affect brake performance.
Identifying Brake Line Problems
Your brake lines are essential for transferring the hydraulic pressure from the master cylinder to your brakes. If you detect that your brakes won’t pressure up, inspect the brake lines for any signs of damage or wear. Look for any visible leaks, kinks, or corrosion. A straightforward test is to disconnect the brake line from the master cylinder, cover the port with your finger, and pump the lever. If you get pressure, it indicates the presence of air in the system, which can usually be rectified by bleeding the brakes.
Master Cylinder Failures
The master cylinder plays a crucial role in managing brake pressure. When you experience a sudden loss of brake pressure or continuous problems despite correctly bleeding the system, your master cylinder might be failing. Check for a bypassing of fluid inside the cylinder or a damaged reservoir which can prevent pressure build-up. Also consider the age and service history of the fluid, as old or contaminated brake fluid can lead to master cylinder issues.
Seal and Gasket Checks
Seals and gaskets within your brake system ensure that fluid does not leak and pressure is maintained. Examine all relevant areas for worn or damaged seals, which could lead to pressure loss. Every gasket in the system should be intact and properly seated. If these components are compromised, they will need to be replaced to regain and maintain the necessary brake pressure.
Advanced Brake System Repairs
When you’re faced with persistent brake pressure problems in your Polaris brake system, advanced repairs may be necessary. These can include dealing with damaged calipers, conducting a master cylinder rebuild or replacement, and addressing clogged or corroded parts.
Replacing Brake Calipers
If you’ve concluded that your brake calipers are failing to function properly, replacing them is crucial. Bad calipers fail to press the pads against the rotors effectively and can also cause a loss of pressure. To replace them:
- Lift and support your vehicle safely.
- Remove the wheel covering the brake caliper.
- Unbolt the caliper from the bracket and disconnect it from the brake line.
- Bolt the new caliper onto the bracket and reconnect the brake line.
- Bleed the brakes to ensure no air is trapped, which could lead to pressure problems.
Master Cylinder Rebuild or Replacement
A failing master cylinder can lead to a lack of brake pressure. If the internal seals are worn out, you need to rebuild or replace the master cylinder.
- To rebuild:
- Purchase a master cylinder rebuild kit specific to your model.
- Disassemble the master cylinder, clean all parts, and replace the seals as instructed by the kit.
- Reassemble and re-mount the master cylinder, then bleed the brake system thoroughly.
- To replace:
- Source a new master cylinder that matches your vehicle’s specifications.
- Uninstall the faulty master cylinder and install the new one, ensuring all connections are secure.
- Bleed the brake system to remove any air that may compromise brake pressure.
Dealing with Corroded or Clogged Parts
Over time, corrosion and clogging can occur within the brake system, leading to pressure problems. To address these:
- Inspect all brake lines and connections for signs of rust or blockage.
- If a clog is identified, attempt to clean the lines using appropriate fluids or replace the affected parts entirely.
- Ensure that all parts replaced are free of corrosion and correctly fitted to avoid future clogging issues.
Frequently Asked Questions
Navigating brake pressure issues on your Polaris ATV can be challenging. Below, you’ll find straightforward answers to some common questions that might arise when you’re facing brake pressure problems.
What could be causing my Polaris ATV brakes to fail at building up pressure?
Your Polaris ATV brakes may fail to build up pressure due to the presence of air in the brake lines or a malfunctioning master cylinder. Ensuring proper bleeding techniques can help address the issue.
After bleeding my Polaris brakes, why is there still no pressure?
If there is still no pressure after bleeding your brakes, inspect the brake lines for damage or leaks. Damaged brake lines can allow air to enter the system and prevent the building of pressure.
What steps should I take if my Polaris Sportsman 500 has no brake pressure?
For a Polaris Sportsman 500 with no brake pressure, start by checking the brake fluid level and quality. Replace old or contaminated brake fluid, and proceed to bleed the brakes, ensuring all air is removed from the system.
Why might my Polaris RZR’s brake pedal lack firmness and pressure?
A lack of firmness and pressure in the Polaris RZR brake pedal typically indicates air in the brake system. Bleeding the brakes is necessary to remove this air. If the problem persists, consider checking for worn brake components.
How can I troubleshoot a Polaris brake system that won’t build pressure?
To troubleshoot a Polaris brake system that won’t build pressure, perform a systematic check of the brake components. Verify the functioning of the master cylinder, check for brake line obstruction or damage, and ensure the system is free of air pockets.
What are common issues when a Polaris vehicle’s brakes won’t maintain pressure after bleeding?
Common issues for Polaris vehicle brakes not maintaining pressure after bleeding include incorrect bleeding techniques, overlooked leaks, or degraded brake components. Double-check the bleeding process and inspect all parts for wear.
Last updated on September 7, 2025