
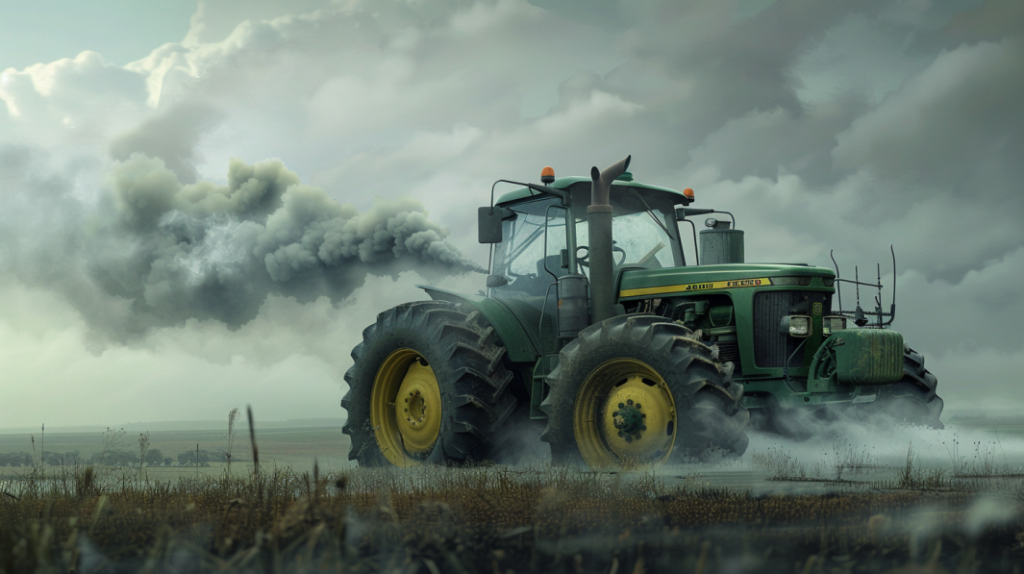
If you own or operate a John Deere 4020 tractor, you might have encountered some common issues that can hinder its performance. From fuel system glitches to transmission troubles and electrical challenges, these problems can disrupt your work and productivity. However, fear not, as there are solutions to these predicaments that can get your 4020 back in top shape. Stay tuned to discover practical tips and remedies to tackle these common John Deere 4020 issues and keep your tractor running smoothly.
Key Takeaways
- Fuel system issues: Check fuel filter for clogs, inspect fuel pump, and clean fuel lines.
- Transmission problems: Address slipping gears, low fluid levels, or worn clutch plates promptly.
- Electrical troubleshooting: Diagnose starting issues, check wiring system, battery, and ignition components.
- Hydraulic system faults: Look for leaks with UV dye, check pump fluid levels, and connections.
- Engine performance concerns: Monitor air filter, fuel injection, ignition system, spark plugs, and coils.
Fuel System Issues
If your John Deere 4020 is experiencing fuel system issues, it may be due to clogging in the fuel lines. Clogging can occur due to dirt, debris, or sediment entering the fuel system. To address this problem, start by inspecting the fuel lines for any visible blockages.
Next, consider cleaning or replacing the fuel filter to guarantee proper fuel flow to the engine. It’s also important to check the fuel pump for any signs of malfunction that may be contributing to the issue.
In addition to clogging, fuel system issues in the John Deere 4020 could also be caused by a faulty fuel injector. A malfunctioning injector can lead to improper fuel atomization and distribution within the engine cylinders, affecting overall performance.
If you suspect a faulty injector, it’s recommended to have it professionally tested and replaced if necessary to restore peak fuel system functionality. Regular maintenance and inspection of the fuel system components are essential to prevent issues and ensure the smooth operation of your John Deere 4020.
Transmission Problems
Examining the transmission system of your John Deere 4020 is essential in identifying and addressing potential issues that may affect its performance. The transmission is a key component responsible for transferring power from the engine to the wheels, allowing for smooth operation. Below is a table outlining common transmission problems and their possible solutions:
| Transmission Problem | Possible Solution |
|---|---|
| Slipping gears | Check transmission fluid levels and quality. Inspect for worn clutch plates. |
| Rough shifting | Adjust clutch linkage and inspect for damaged gears. Ensure proper lubrication. |
| Transmission leaks | Check for damaged seals and gaskets. Replace if necessary. Monitor fluid levels. |
Regular maintenance and timely troubleshooting can help prevent these transmission issues from escalating and causing further damage to your John Deere 4020. Remember to follow manufacturer guidelines for fluid types and maintenance intervals to keep your transmission running smoothly.
Electrical Troubleshooting
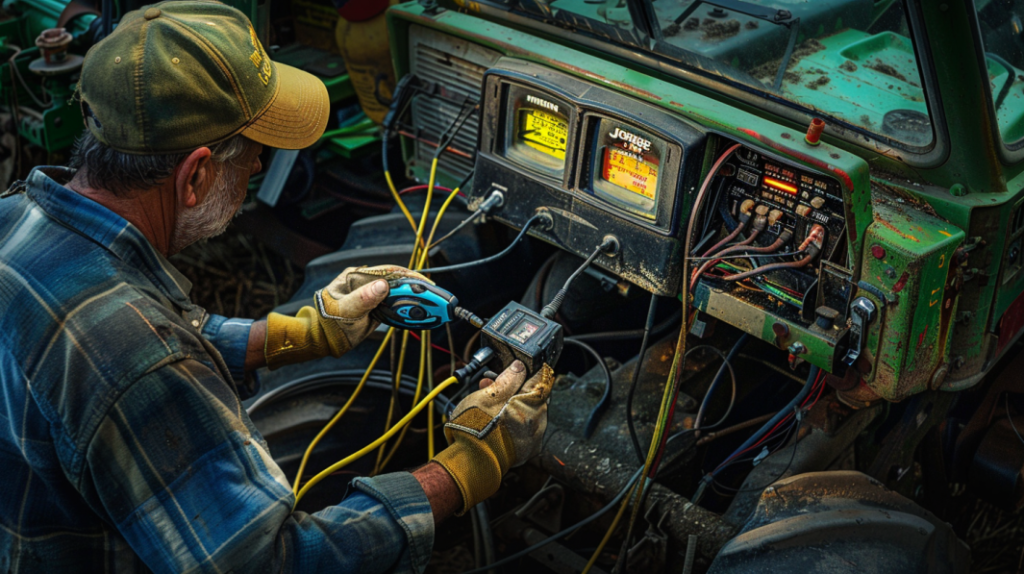
When troubleshooting electrical issues on your John Deere 4020, it’s important to start by diagnosing any starting problems.
Begin by inspecting the wiring system to identify any damaged or worn-out components that could be causing electrical malfunctions.
A systematic approach to these electrical troubleshooting steps will help pinpoint and resolve issues efficiently.
Starting Issues Diagnosis
To diagnose starting issues with your John Deere 4020, start by conducting a thorough electrical troubleshooting process. First, check the battery to make sure it’s fully charged and the terminals are clean and tight. Next, inspect the battery cables for any corrosion or damage that may impede the flow of current. Test the starter solenoid by listening for a clicking sound when you turn the ignition key. If there’s no sound, the solenoid may need to be replaced. Additionally, examine the ignition switch for any signs of wear or malfunction.
Further, assess the condition of the alternator and voltage regulator to verify they’re functioning correctly and providing sufficient power to the electrical system. Inspect the wiring harness for any frayed wires or loose connections that could be causing a disruption in the electrical flow.
Wiring System Inspection
Inspect the wiring system of your John Deere 4020 to identify any potential issues affecting its electrical performance. Start by visually examining all wiring harnesses, connectors, and terminals for signs of damage, corrosion, or loose connections. Verify that the wires are properly routed and secured to prevent chafing against other components. Use a multimeter to check for continuity and voltage drops along the wiring to pinpoint any areas of high resistance or breaks in the circuit.
Next, assess the condition of fuses and relays in the electrical system. Replace any blown fuses and test relays for proper functioning. Inspect the battery cables for tightness and corrosion, as poor connections can lead to electrical issues. Additionally, examine the alternator and voltage regulator for proper operation to guarantee a consistent power supply to the system.
Hydraulic System Faults
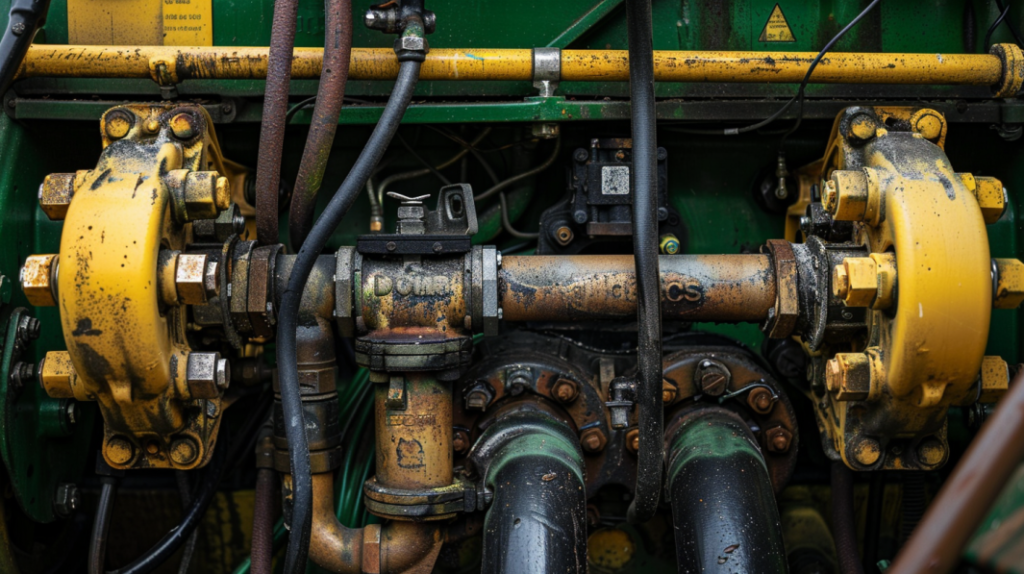
When troubleshooting hydraulic system faults on your John Deere 4020, it’s essential to familiarize yourself with leak detection methods and pump malfunction troubleshooting.
Identifying the source of leaks through visual inspection, pressure testing, or using ultraviolet dye can help pinpoint areas requiring maintenance.
Additionally, understanding how to diagnose pump malfunctions such as low pressure, noisy operation, or erratic performance is important for maintaining peak hydraulic system functionality.
Leak Detection Methods
Utilize a UV dye injection method to pinpoint hydraulic system leaks in your John Deere 4020 tractor. This method involves adding a UV dye to the hydraulic system, which will be visible under UV light, making it easier to trace the source of leaks accurately.
- UV Dye Injection: Inject a UV dye into the hydraulic system to highlight leaks.
- Inspect Under UV Light: Use a UV light to inspect the system for any fluorescent traces of the UV dye, indicating leak locations.
- Systematic Approach: Start from the highest point of the system and work your way down to guarantee thorough leak detection coverage.
Pump Malfunction Troubleshooting
To troubleshoot pump malfunctions in the hydraulic system of your John Deere 4020 tractor, first, assess the fluid levels and confirm that there are no external leaks affecting the pump’s performance. Low fluid levels can lead to air entering the system, causing cavitation and reduced pump efficiency.
Check the hydraulic fluid for signs of contamination, such as dirt or water, which can damage the pump. Inspect the pump’s inlet and outlet connections for any blockages that could impede fluid flow.
If the pump is making unusual noises or vibrating excessively, it may indicate internal damage requiring professional inspection. Monitor the system for overheating, as this can be a sign of pump strain or failure.
Regular maintenance, including filter replacements and fluid checks, can prevent many pump-related issues. By staying vigilant and addressing potential problems promptly, you can keep your John Deere 4020 hydraulic pump functioning at its best.
Engine Performance Concerns
Experiencing inconsistent power output or unusual noises from the engine of your John Deere 4020 may indicate underlying performance issues that require immediate attention. When faced with engine performance concerns, it’s important to diagnose and address the problem promptly to prevent further damage.
Here are some common issues and solutions to think about:
- Dirty Air Filter: A clogged air filter can restrict airflow to the engine, leading to reduced performance. Regularly inspect and clean or replace the air filter to ensure peak engine function.
- Faulty Fuel Injection: Problems with the fuel injection system can result in poor engine performance, including rough idling or stalling. Inspect the fuel injectors for clogs or leaks and consider a professional cleaning or replacement if necessary.
- Ignition System Troubles: Issues with the ignition system can cause misfires, reduced power, or difficulty starting the engine. Check the spark plugs, ignition coils, and wires for wear or damage, replacing any faulty components to restore engine performance.
Steering Malfunctions
If you notice erratic steering behavior or difficulty controlling the direction of your John Deere 4020, it may be indicative of steering malfunctions that require prompt inspection and resolution. Steering malfunctions can stem from various issues such as low power steering fluid levels, damaged steering components, or misaligned steering linkage.
To diagnose the problem, start by checking the power steering fluid levels and ensuring they’re within the recommended range. If the fluid levels are adequate, examine the steering components for any signs of wear, corrosion, or damage. Common culprits include worn-out steering gears, loose steering belts, or malfunctioning steering pumps.
Additionally, inspect the steering linkage to verify that it’s correctly aligned and not causing any obstructions or restrictions in movement. Misaligned steering linkage can lead to unresponsive steering and difficulty in controlling the tractor’s direction.
Addressing steering malfunctions promptly is essential to maintain safe operation of your John Deere 4020 and prevent further damage to the steering system.
If the issue persists after basic inspections, seek assistance from a qualified technician to conduct a thorough assessment and implement the necessary repairs.
Braking System Problems
If you’re experiencing braking system problems with your John Deere 4020, keep an eye out for brake fluid leaks, a common issue that can compromise the system’s efficiency.
A spongy brake pedal could indicate air in the brake lines, affecting responsiveness and safety.
Uneven brake wear is another signal of potential problems, requiring immediate attention to prevent further damage and guarantee peak braking performance.
Brake Fluid Leaks
Inspecting the brake system of your John Deere 4020 for any signs of brake fluid leaks is vital to guarantee peak performance and safety. Brake fluid leaks can compromise the braking system’s effectiveness, leading to potential hazards during operation. Here’s what to look for:
- Check Brake Lines: Inspect all brake lines for any visible signs of leakage, such as wet spots or drips along the lines.
- Examine Brake Calipers: Check the brake calipers for any signs of brake fluid seepage around the caliper pistons.
- Inspect Brake Master Cylinder: Look for brake fluid accumulation around the brake master cylinder reservoir, as this could indicate a leak in the cylinder seals.
Addressing brake fluid leaks promptly is essential to maintaining the integrity of your braking system. If you notice any signs of leakage, it’s recommended to fix the issue immediately to uphold the safety and performance of your John Deere 4020.
Brake Pedal Sponginess
Experiencing brake pedal sponginess in your John Deere 4020 may indicate underlying issues within the braking system that require immediate attention. Sponginess, characterized by a lack of firmness and a mushy feel when applying the brakes, can compromise the effectiveness of your braking system and pose a safety risk.
The most common cause of brake pedal sponginess is air in the brake lines. Air bubbles reduce the hydraulic pressure needed for proper brake function, leading to the soft pedal sensation. To address this, you’ll need to bleed the brake system to remove any air. Start by locating the brake bleeder valves on each wheel cylinder and follow the manufacturer’s guidelines for bleeding the brakes.
Additionally, check for any brake fluid leaks that may have introduced air into the system. Properly maintaining your brake system by regularly checking for leaks and ensuring the correct fluid levels can help prevent brake pedal sponginess and keep your John Deere 4020 operating safely.
Uneven Brake Wear
Uneven brake wear in your John Deere 4020 can indicate underlying issues within the braking system that require prompt attention. This problem can lead to reduced braking efficiency, uneven stopping distances, and potential safety hazards. To address this concern effectively, consider the following:
- Inspect Brake Pads: Check the brake pads for signs of uneven wear, such as one pad being more worn down than the others. Uneven brake pad wear can suggest issues with calipers or hydraulic components.
- Check Brake Calipers: Examine the brake calipers for proper functioning. Sticking or seized calipers can cause uneven brake application, leading to uneven wear on the brake pads.
- Evaluate Brake Fluid Levels: Make sure the brake fluid levels are adequate and free of contaminants. Low brake fluid levels or contaminated fluid can impact brake performance, contributing to uneven brake wear patterns.
Addressing uneven brake wear promptly is essential to maintaining your John Deere 4020’s braking system’s integrity and ensuring safe operation. Regular inspections and timely maintenance are key to preventing further damage and maintaining excellent braking performance.
PTO Issues
The malfunction of the Power Take-Off (PTO) system on the John Deere 4020 can greatly impact the efficiency and performance of various agricultural tasks. When encountering PTO issues, one common problem is the failure of the PTO shaft to engage or disengage properly. This can be caused by worn-out PTO clutch plates or misadjusted linkage. To troubleshoot this, check the clutch plates for wear and adjust the linkage according to the manufacturer’s specifications.
Another prevalent PTO issue is the PTO shaft slipping under load. This can occur due to a damaged PTO clutch or a worn PTO driveshaft. To address this, inspect the clutch for damage and replace if necessary. Additionally, examine the driveshaft for wear and replace it if worn out.
Moreover, if the PTO fails to maintain a consistent speed, it could be indicative of a faulty PTO governor. In such cases, inspect the governor for any signs of damage or wear and replace it as needed to guarantee the proper functioning of the PTO system.
Cooling System Failures
In cases of cooling system failures on the John Deere 4020, it’s essential to address potential issues promptly to prevent engine damage. When dealing with cooling system problems, you must be diligent in diagnosing and resolving them to make sure the tractor operates efficiently.
Here are key points to keep in mind:
- Overheating Concerns: Keep an eye out for any signs of overheating, such as steam coming from the radiator or a temperature gauge reading above normal levels. Addressing overheating promptly can prevent severe engine damage.
- Coolant Leaks: Inspect the cooling system regularly for any leaks. Leaks can lead to a loss of coolant, causing the engine to overheat. Identifying and fixing leaks promptly is essential to maintaining the cooling system’s integrity.
- Thermostat Malfunctions: A faulty thermostat can disrupt the proper functioning of the cooling system, leading to overheating issues. If you notice inconsistent temperature readings, consider checking the thermostat for any malfunctions and replace it if necessary.
Blade Performance Challenges
Addressing blade performance challenges on the John Deere 4020 requires thorough evaluation and precise adjustments to optimize cutting efficiency. When encountering issues with the blades on your tractor, it is essential to diagnose and resolve them promptly to maintain productivity. Here are some common blade performance challenges you may face with your John Deere 4020 and their solutions:
| Blade Performance Challenges | Possible Causes | Solutions |
|---|---|---|
| Blades not cutting efficiently | Dull blades or incorrect blade angle | Sharpen or replace blades; adjust blade angle properly |
| Uneven cutting patterns | Uneven blade wear or deck misalignment | Rotate or replace blades; realign deck properly |
| Blades not engaging | Damaged engagement cable or faulty PTO switch | Replace engagement cable; repair or replace PTO switch |
Frequently Asked Questions
How Can I Prevent Corrosion in My John Deere 4020?
To prevent corrosion in your John Deere 4020, make sure to regularly clean and dry all exposed metal surfaces.
Apply a protective coating like wax or rust inhibitor to create a barrier against moisture.
Keep an eye out for any scratches or chips in the paint and touch them up promptly.
Store your tractor in a dry, covered area when not in use to minimize exposure to the elements.
Are There Any Aftermarket Upgrades for the John Deere 4020?
Looking to enhance your John Deere 4020’s performance? Aftermarket upgrades can help unlock more power from your tractor. Improved fuel injectors, upgraded exhaust systems, and enhanced air intake kits are popular options. These upgrades can optimize fuel efficiency, increase horsepower, and enhance overall performance.
However, be sure to research compatibility and quality to avoid any potential issues. Upgrading your 4020 can be a game-changer for your farming operations.
What Maintenance Schedule Is Recommended for the John Deere 4020?
For the John Deere 4020, a recommended maintenance schedule involves regular checks on fluid levels, engine oil, filters, and tire pressure.
Inspect the brakes, steering components, and battery for wear. Grease fittings and pivot points need attention.
Stay on top of coolant levels and hydraulic fluids. Regularly check belts, hoses, and electrical connections.
Following this schedule helps prevent breakdowns and guarantees peak performance for your John Deere 4020.
Can I Use Alternative Fuels in My John Deere 4020?
Yes, you can use alternative fuels in your John Deere 4020. However, it’s vital to confirm the fuel is compatible with the engine to prevent damage.
Some alternative fuel options include biodiesel or ethanol blends.
It’s advisable to consult with your manual or a professional to determine the appropriate fuel type and any necessary modifications for best performance and longevity of your equipment.
What Are Some Tips for Storing My John Deere 4020 During the Off-Season?
When storing your John Deere 4020 during the off-season, make sure the fuel tank is full to prevent condensation. Add a fuel stabilizer and run the engine for a few minutes to distribute it.
Change the oil and filter to prevent contaminants from corroding the engine. Grease all fittings and store the tractor in a dry, ventilated space.
Remove the battery and store it in a cool, dry place to maintain its charge.
Conclusion
To sum up, regular maintenance and prompt repairs are essential for addressing common issues with the John Deere 4020 tractor.
For example, a farmer in Iowa noticed his tractor’s transmission slipping gears, leading to decreased efficiency in the field. After a thorough inspection and timely repair, the transmission was fixed, and the tractor was back to peak performance.
Stay proactive in addressing these problems to guarantee smooth operations and maximize productivity.